













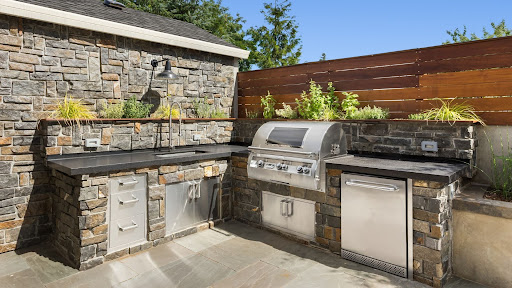
An outdoor kitchen can turn a plain patio into the spot where everyone ends up. It’s also one of the easier ways to get more use out of space you already own. The trouble is that it’s easy to overspend or build something that never quite works. A good plan solves most of that before any concrete is poured. Here’s how to think it through, from layout to utilities to budget.
Start With How You Actually Cook
Before looking at appliances, think about what you really make outdoors. If burgers and grilled vegetables cover most of it, a grill and some counter space may be plenty. If you host often, you may want a sink, a fridge, and a spot for prep.
A simple test helps. Picture your last three cookouts and list what you wished you had. That list is a better guide than any showroom layout.
Pick the Right Spot
Location affects safety, comfort, and cost, so settle it early.
- Stay close to the house. A short walk to the indoor kitchen makes serving easier and keeps utility runs shorter.
- Think about wind and sun. Smoke should drift away from seating and windows. Hot afternoon sun can make the cook’s spot miserable.
- Leave room to move. A common rule of thumb is about three feet of walkway around the cooking area, and more if guests will line up for food.
- Respect fire safety. Guidance from Massachusetts fire officials says grills should sit 10 feet from the side of a building unless the manufacturer’s instructions allow less. It also says to keep them away from deck railings and out from under overhanging branches.
Local codes vary, so check yours before you finalize anything. A covered patio can be a great place to relax, but grills generally don’t belong under a roof, overhang, or wall.
Choose a Layout That Matches Your Space
Most outdoor kitchens fall into three shapes:
- Straight line: The simplest and cheapest option. It fits along a wall, fence, or the edge of a patio.
- L-shape: More counter space and a natural work zone between the grill, prep area, and sink.
- Island: Guests can gather on the other side while you cook. It’s also the one that takes the most room.
Pick the layout your yard can handle comfortably. A cramped island is worse than a well-planned straight run.
Decide What Goes In It
Start with the grill, then add pieces in order of how much you’ll use them:
- Counter space. Most people wish they had more of it.
- Storage. Sealed drawers and doors keep tools, spices, and propane accessories handy.
- A sink. Handy for prep and cleanup, but it adds plumbing.
- A fridge. Saves trips indoors, especially for drinks.
- Extras. Side burners, pizza ovens, and smokers are fun, but they can wait.
Counter space matters more than gadgets. A grill with a generous landing zone on both sides is easier to cook on than a loaded setup with nowhere to set a plate.
Plan Utilities Early
Utilities are the part that surprises people most, so map them before choosing finishes.
- Gas: A natural gas line or a propane tank. Gas lines should be installed by a licensed professional.
- Electric: Outdoor outlets for a fridge, lights, or small appliances need proper weather protection and GFCI safety.
- Water: A sink needs a supply line and a drain. If your winters freeze, plan a way to shut off and drain the lines each fall.
Running lines is much easier before the countertops and surfaces go in. Doing it afterward usually means tearing something out.
Choose Materials That Hold Up Outside
Outdoor surfaces face sun, rain, grease, and temperature swings. Durability matters more than looks alone.
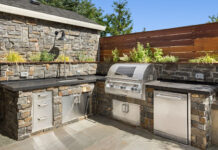
- Countertops: Granite, concrete, and porcelain handle heat and weather well. Choose a sealed or low porosity surface so water doesn’t soak in.
- Cabinets and doors: Stainless steel and other marine grade options resist rust. Plain wood and indoor cabinet materials tend to warp.
- Base and structure: Stone, brick, or block stands up to weather and gives a sturdy base for heavy appliances.
In cold climates, freezing water inside porous materials can cause cracks over time. Choosing materials rated for outdoor use saves repair costs later.
Built In or Modular
A built-in kitchen is custom and permanent. It can look great, but it usually costs more and takes longer. A modular setup arrives in sections, goes in faster, and can often be expanded or rearranged later.
If you’re not sure how big to go, it helps to look through outdoor kitchen options before settling on a layout. Seeing real dimensions makes it easier to judge how much space each piece needs and how it fits next to your patio furniture.
Set a Budget You Can Live With
Costs vary a lot by region, materials, and appliance choices, so get a few quotes before committing. A few habits keep the budget under control:
- Spend on the foundation first. A solid base, proper utilities, and durable counters are expensive to fix later.
- Phase the project. Start with the grill and counter, then add the fridge or sink next season.
- Keep a cushion. Set aside some extra for surprises like drainage work or an electrical upgrade.
Make It Comfortable
A kitchen people want to linger around beats a perfect cooking setup. Add task lighting over the grill and softer lighting for seating. A pergola, awning, or umbrella gives some shade. Even a small bar counter with a couple of stools can turn the cook into part of the party.
Keep It in Good Shape
Regular care keeps an outdoor kitchen looking and working well. Cover appliances in the off season, clean grease from the grill after heavy use, and check gas fittings each spring. If you have a sink, drain the lines before the first freeze.
Key Takeaways
- Decide how you really cook before choosing appliances.
- Place the kitchen close to the house, and follow fire safety distances.
- Settle gas, electric, and water plans before finishing surfaces.
- Pick weatherproof materials, and spend on the base and counters first.
- Start small and add pieces over time.
A well-planned outdoor kitchen should feel like a natural extension of your home. Take your time on the plan, and the build will go more smoothly.